
How to import and export expenses
Import
On the Expenses page, open "Actions" and choose "Import Expenses". Kompass imports expenses from a .csv file with the following fields:
- date: date of the expense.
- amount: amount of the expense.
- payment_method_id: your organization sets the payment methods for your Kompass account. Each payment method has an ID; you need the list of payment methods with their IDs to populate the file correctly.
Each record must have information for all three fields above.
Choosing the file checks it and shows how many expenses Kompass will create or update, or lists the rows with problems. Nothing is saved until you click "Import". For the details, see Import records from a CSV file.
There are several other fields that can be included in the .csv for direct importing into Kompass. For a full list of those fields, check Import Expenses.
Export
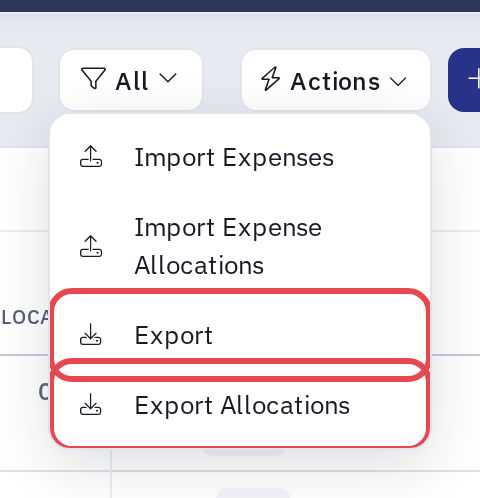
Go to the "Expenses" page. If you have the necessary permissions, the "Actions" menu includes "Export" and "Export Allocations".

"Export" exports one row per expense. "Export Allocations" exports one row per allocation of each expense.
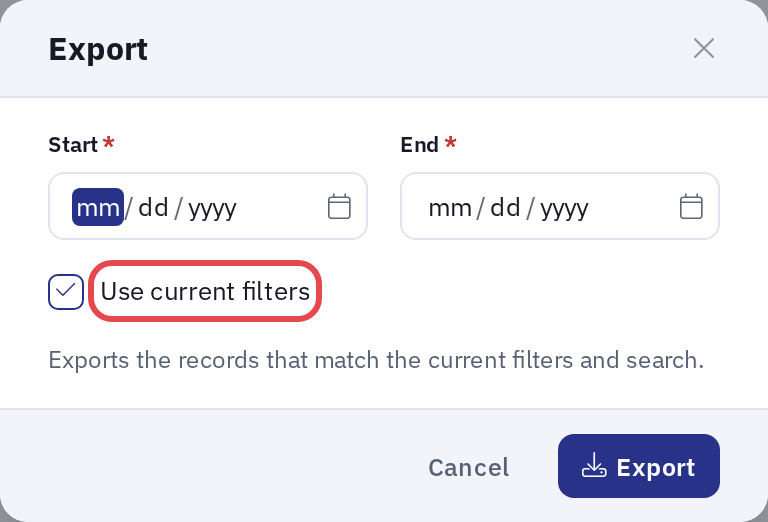
Choosing either option opens a dialog that asks for a start and end date. If the list is filtered by date, the dialog starts with those dates; otherwise enter them before clicking "Export". The period can be at most one year. The export includes expenses dated in the period, and expenses submitted, checked, approved or rejected in it. The browser saves the .csv file to your downloads folder.
The "Use current filters" option is ticked each time the dialog opens. While it is ticked, the export includes only the expenses that match the list's filters and search, custom field filters included; "Export Allocations" then exports the allocations of those expenses. Untick it to export every expense in the period, whatever the list is showing. The list keeps its filters between visits, so check them before you export.
If you don't see the Actions menu or the Export option, contact your company Kompass administrator.