
Edit and move items on schedule
Move Tasks
- From the "Schedule" page, make sure the schedule is grouped by Employee, then turn on the "Edit" switch. Dragging is disabled when tasks are grouped by project, manager, or task type. When you hover over a task, a four-way arrow handle appears and the cursor changes to a grab icon.
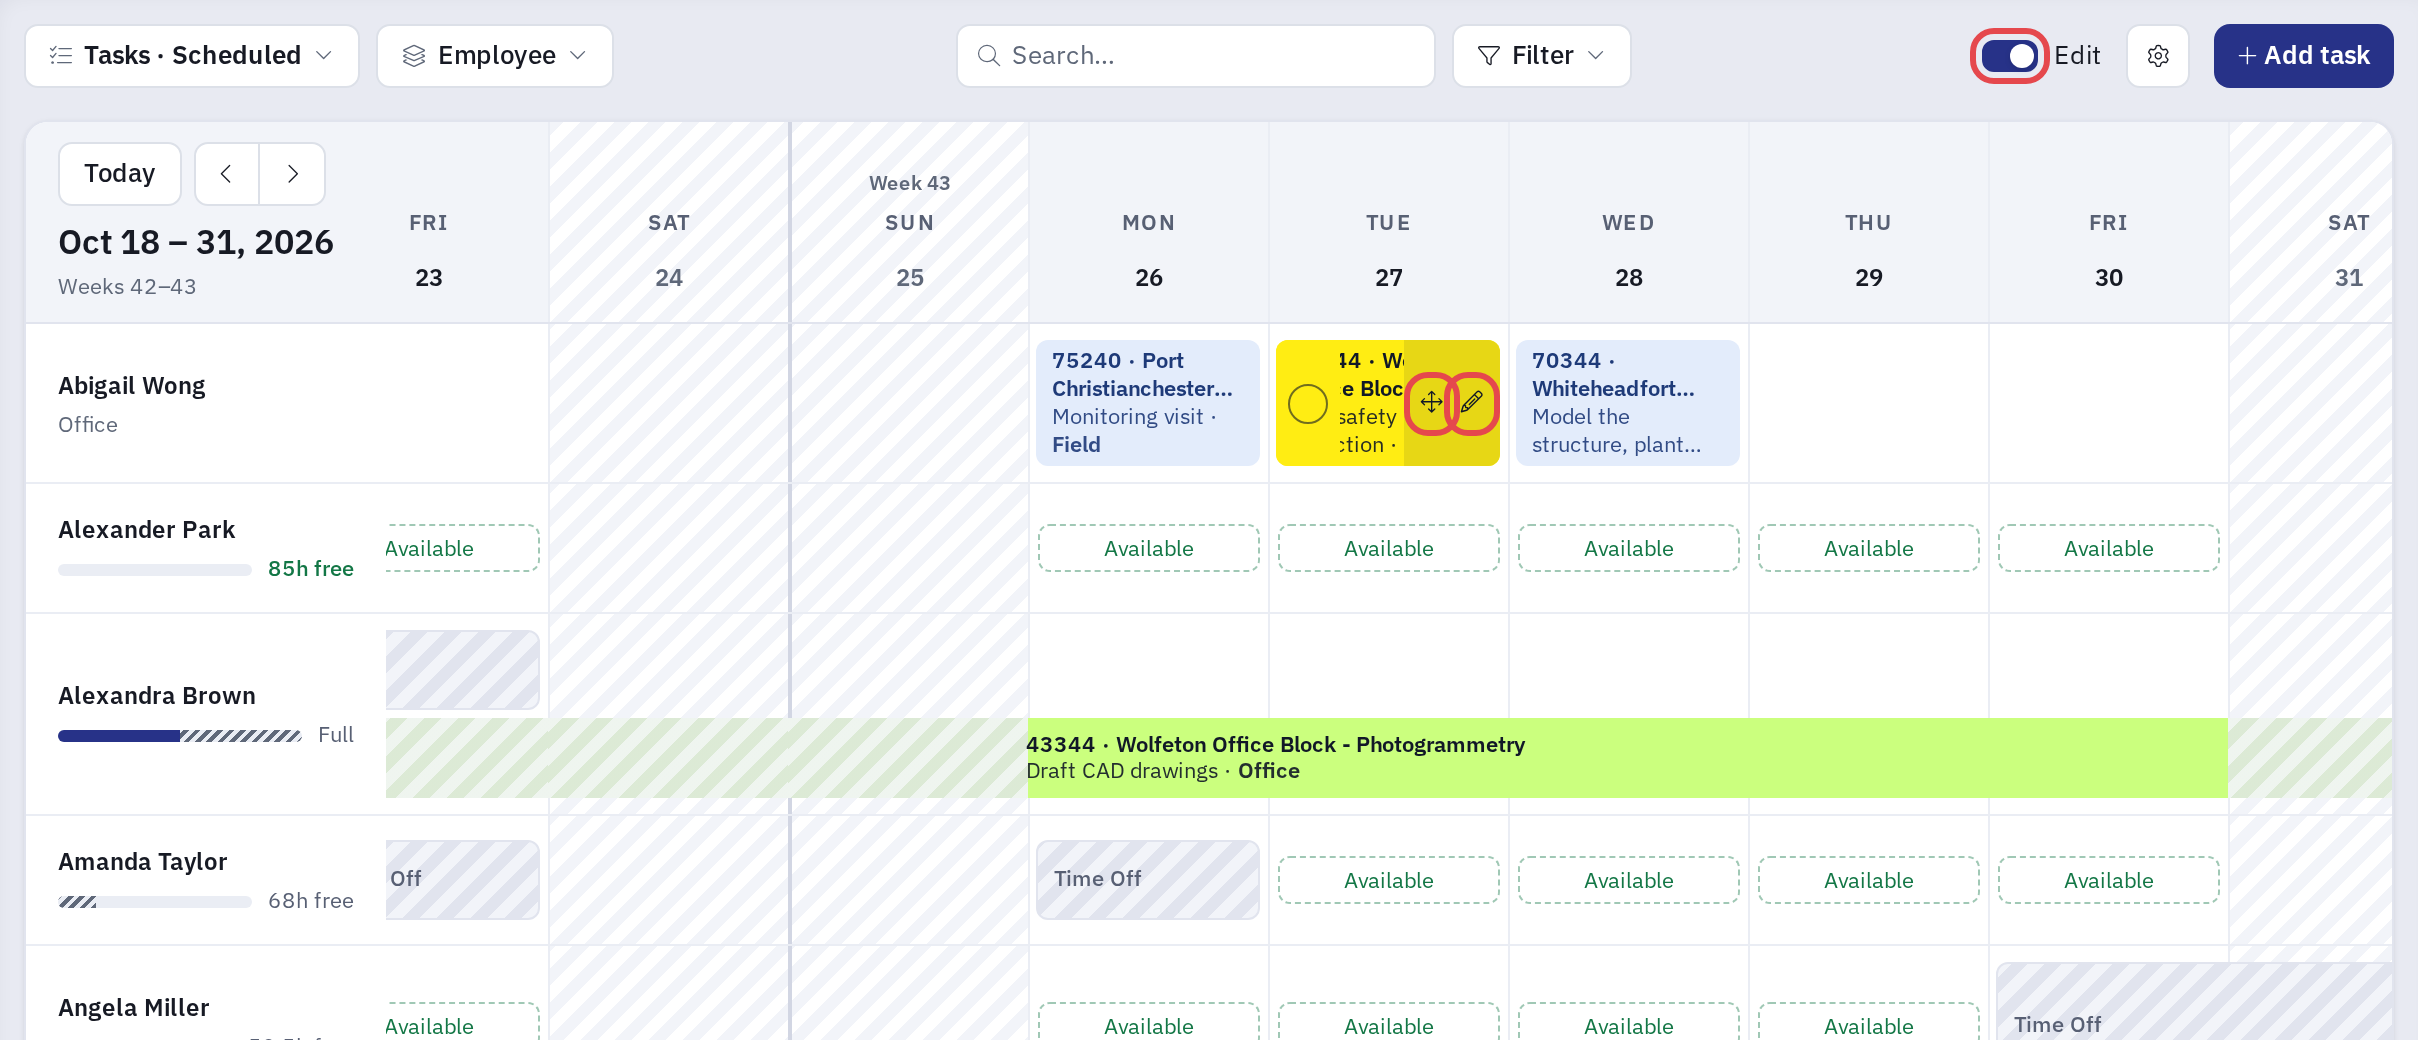
- Press and hold the mouse button, then drag the task to a different date and/or person.
- Release the mouse button in the desired location. The task is rescheduled to the new person and date.
Edit Tasks
- While still in edit mode, hover over the pencil next to the task you want to quick edit and click it.
- Complete the "Edit Task" form.
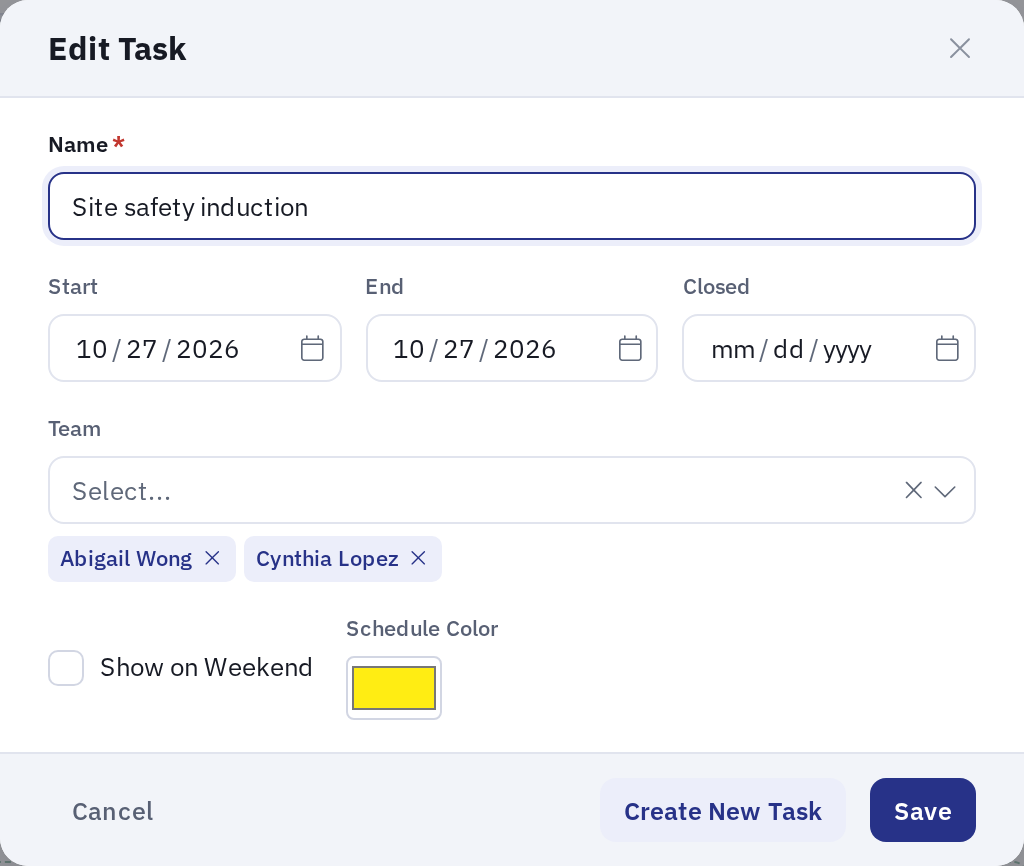
- The available fields are:
| NAME | DESCRIPTION | REQUIRED/ OPTIONAL |
| Name | Allows you to quickly change the name of the task if needed. | Required |
| Start | The scheduled start date for the task. | Optional |
| End | The scheduled end date for the task. | Required |
| Closed | The date after which the task no longer accepts recorded time. | Optional |
| Team | You can add extra employees by clicking the "Team" box or remove employees by clicking the "x" next to the employee you want to remove. | Optional |
| Show on Weekend | Tick if the task is worked on weekends and holidays. | Optional |
| Schedule Color | You can pick the color of your liking for the task. Helpful if you want to quickly communicate urgent tasks, equipment to be used etc. via the color. | Optional |
- Click either "Save" or "Create New Task." With "Save" you are saving the existing task with any added changes. With "Create New Task" you are duplicating the task by creating a new one that will use the dates and team you have set in the "Edit Task" form.

Note: Edit mode also applies to the Equipment view. There, the pencil opens an Assign Equipment dialog where you choose the day and the person the equipment is assigned to.